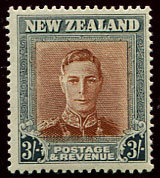
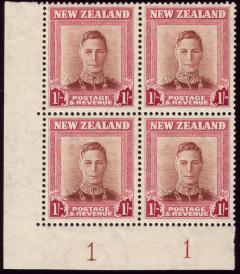
There are four shilling values, 1s, 1s 3d, 2s and 3s. They were printed by De La Rue and issued on 1 May, 1947.
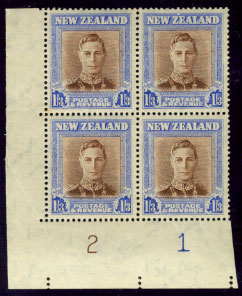
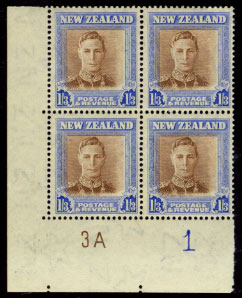
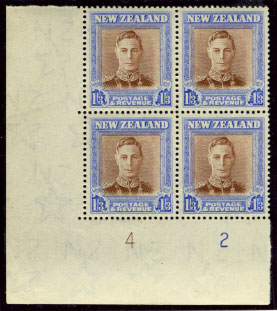
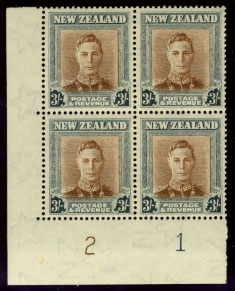
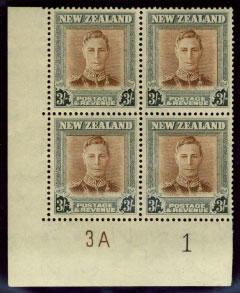
The centre plate design is the same for all values. Four centre plates were used: 1, 2, 3A and 4. Plate 1 was used for the 1s and 2s values, plate 2 for the 1s 3d and 3s values, plate 3A for the 1s, 1s 3d and 3s values and plate 4 for the 1s and 1s 3d values.
Each value has different frame plates. There is only one frame plate for each of the 2s and 3s values (plate 1) while the 1s and 1s 3d values have two frame plates (1 and 2).
The sheets had 160 stamps in 16 rows of 10 and were perf 14.
Centre plate dies
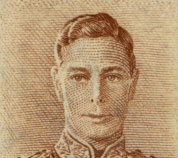
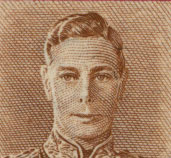
Centre plate dies 1 and 2
There are two centre plate dies. Die 1 was used in plate 1 while die 2 was used in plates 2, 3A and 4. The shading behind the King's head is much heavier in die 2 as can be seen in the examples on the left.
The 2s only exists from die 1 while the 1s 3d and 3s
are always die 2.
The 1s exists from both dies.
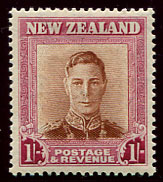
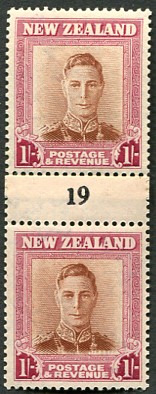
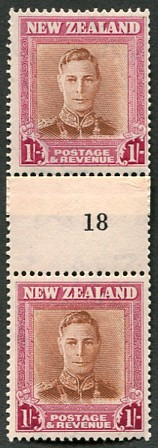
One Shilling
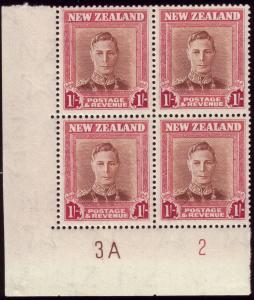
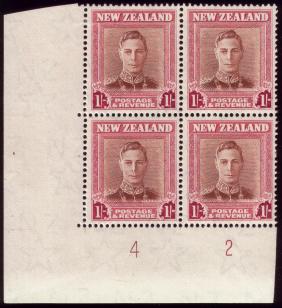
The 1s value has two frame plates. Frame plate 1 occurs in combination with centre plate 1 (die 1) while frame plate 2 is in combination with centre plates 3A and 4 (die 2).
1s stamps from die 1 exist with both sideways and with upright watermarks while the watermark with die 2 is always upright.
Stamps from plate 3A-2 were issued in March 1950 and from plate 4-2
in January 1952.
Frame plates 1 and 2
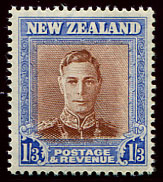
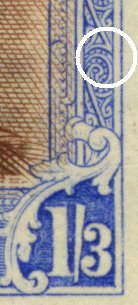
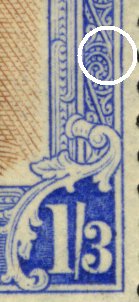
1s 3d frame plates
The two frame plates for the 1s 3d value differ in that there is a constant flaw in plate 2 due to damage in the transfer roller. It results in a break in a line in the ornamental panel.
The centre plate of the 1s 3d value is always die 2.
Frame plate 1 occurs in combination with centre plates 2 and 3A while frame plate 2 occurs in combination with centre plates 3A and 4.
The watermark of stamps printed from frame plate 1 is always sideways.
Stamps from plate 3A-2 with sideways watermark were issued in March 1950
and with an upright watermark in February 1953.
Stamps from plate 4-2 have an upright watermark and were isued in January 1952.

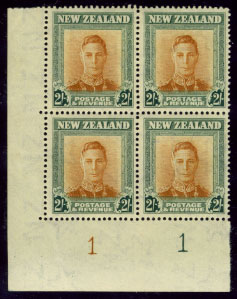
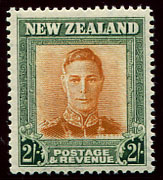
Two shillings
The 2s value only exists with frame and centre plates both 1, i.e. the centre is always die 1.
It occurs with both an upright and with a sideways watermark
with the sideways watermark being the more common.
Three shillings
The three shillings exists with centre plates 2 and 3A, i.e. the centre is always die 2. There was only one frame plate. Stamps from centre plate 3A were issued in 1949.
The 3s always has a sideways watermark.
Counter Coil Pairs
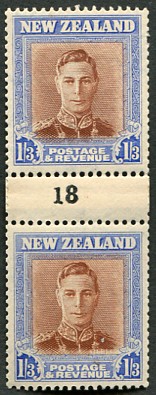
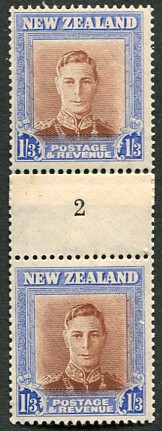
Both the 1s and 1s 3d were made up into counter coils with printed black numbers.
The 1s exists in both centre die 1 and centre die 2. Centre die 1 pairs exist with watermarks both upright, both sideways or in combination. Centre die 2 pairs have upright watermark.
The 1s 3d exists in both die 1a (frame plate 1) and die 1b (frame plate 2).
The watermark is sideways in both.
![]()
![]()
back next
The above information is taken from The Postage Stamps of New Zealand Vols 2 and 4, published by the Royal Philatelic Society of New Zealand in 1950 and 1964. All scans were made by the author.