The dies of the 1d, 2d and 6d values were recut leading to variations in the different plates.
States of the 1d die
Only one die was used in the production of the 1d plates, but it was recut on two occasions. The three states are usually referred to as die1, die 2 and die 3.
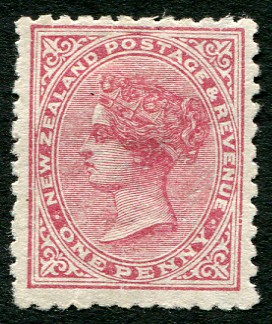
state 1 (1882)
Background lines heavy giving a murky appearance.
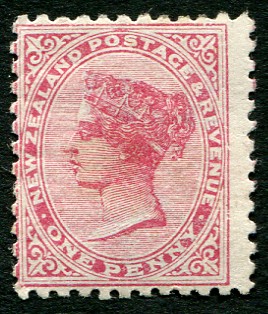
state 2 (1886)
Background lines opened up so Queen's head stands out more clearly. Breaks in lines to left of Queen's forehead.
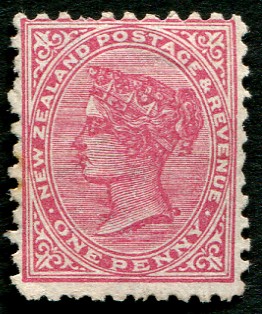
state 3 (1889)
Lines within Queen's crown and hair opened up. Prominent un-shaded part shaped like a "1" in crown above Queen's ear.


There were seven 1d plates. Plates 1, 2 and 3 were from the first state of the die, plates 4 and 5 from the second and plates 6 and 7 from the third.
The first six plates did not wear well while plate 7 lasted from late 1890 until the end of the issue in 1900.
States of the 2d die
Again only one die was used in the production of the 2d plates and it too was recut on two occasions. The three states are usually referred to as die1, die 2 and die 3.
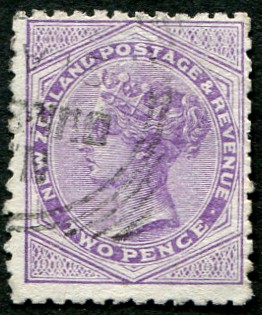
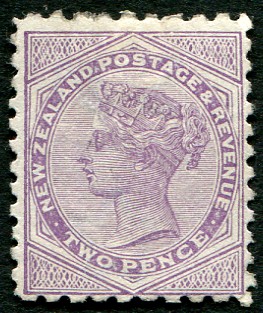
first state (1882)
Background lines heavy and complete.
second/third state (1886/1889)
Background lines around the Queen's head opened up so the head stands out more clearly. Breaks in lines above and to the left of Queen's head.
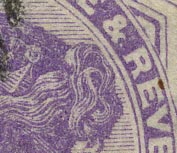
Heavy lines within Queen's head.

Lines within Queen's head opened up. White vertical line in the hair directly under &.
There were five plates of the 2d. Plates 1 and 2 were from the first state of the die, plate 3 from the second and plates 4 and 5 from the third.
The early plates did not wear well while plate 5 was used from 1890 to 1900.
States of the 6d die
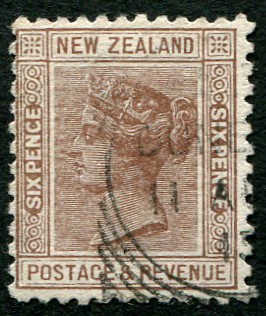
first state (1882)
Heavy background lines.
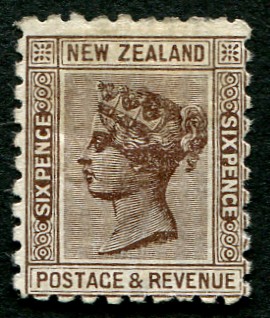
second state (1892)
Less heavy background lines so Queen's head stands out more clearly.
There are two states of the 6d die, normally referred to as die 1 and die 2.
There were three plates of the 6d. Plates 1 and 2 were from the first state of the die while plate 3 was from the second. In the second state, the horizontal lines are much clearer.
6d was the standard postal rate to
the UK.
![]()
![]()
back next
The above information is taken from The Postage Stamps of New Zealand Vol 4, published by the Royal Philatelic Society of New Zealand in 1964. All scans were made by the author.